
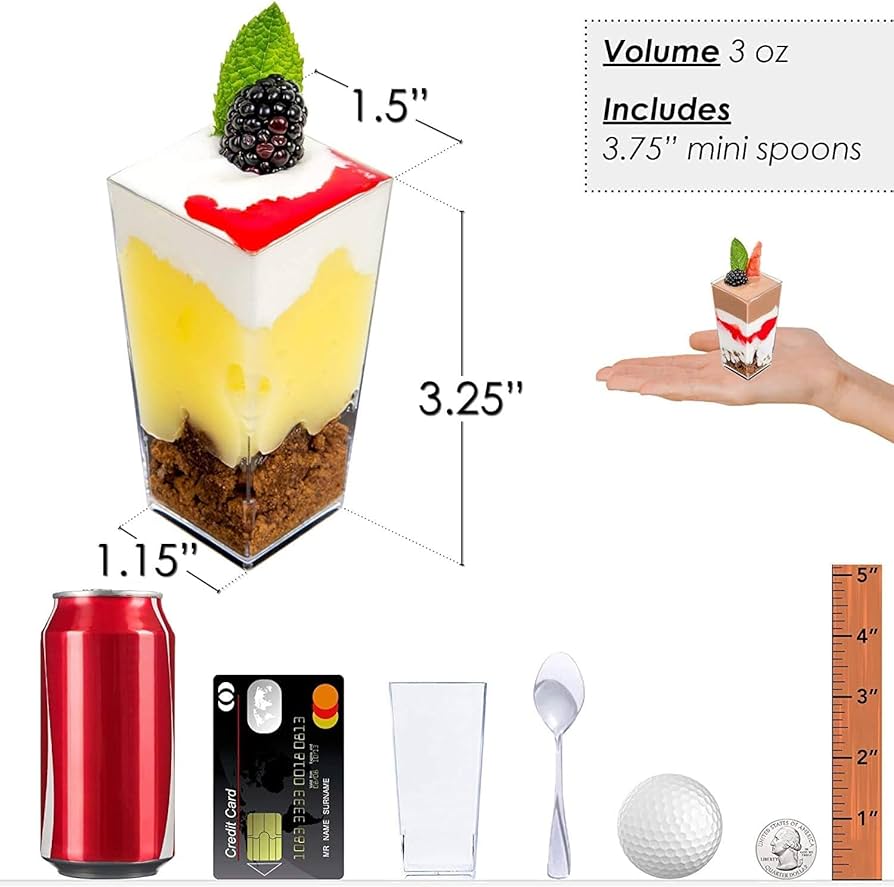
Alright, so I decided I was going to get a bit fancy for a little get-together I was hosting. You know how it is, you see these pretty pictures online, and you think, “Yeah, I can do that!” My big idea this time? Individual desserts. And I stumbled upon these 3 oz dessert cups. Seemed like the perfect size, not too much, not too little.
Getting Started with These Little Cups
First off, I had to actually get my hands on these things. I headed to one of those party supply stores, the kind that has aisles of plastic everything. Found a whole sleeve of them, clear plastic ones. I figured, easy cleanup, right? No way was I dealing with washing a ton of tiny glass cups after everyone left. So, I grabbed a big pack, probably more than I needed, but better safe than sorry, I always say.
Back home, I laid them all out on the counter. They looked… small. Really small. I started to second-guess if they’d even hold enough to be satisfying. But hey, I’d bought them, so I was committed.
The Actual Dessert Making and Filling Saga
My plan was a simple layered dessert – some crushed cookies at the bottom, then a cheesecake-y filling, and a bit of fruit topping. Sounds easy, doesn’t it? Well, let me tell you.
Crushing the cookies was fine. Getting the crumbs into those tiny cups without making a mess everywhere? That was challenge number one. I tried a spoon, but crumbs went flying. Ended up making a little paper funnel, which sort of worked, but it was slow going.
Then came the filling. I whipped it up, nice and smooth. I thought, “A piping bag! That’s the professional way!” So, I got out my piping bag. Filling the bag was messy enough, but then trying to pipe a neat swirl into each of those 3 oz cups, getting just the right amount, and not smearing it all up the sides… let’s just say my kitchen started to look like a dessert battlefield. Some were too full, some looked a bit sad and empty. Consistency was not my friend that day.
Topping them with a tiny bit of fruit compote was the easiest part, thankfully. But by then, I’d been at it for what felt like ages. My back was aching from leaning over the counter, meticulously filling each little cup.
- Sourcing the cups: Easy enough, found them at a party store.
- Initial thoughts: They looked cute but very small.
- The filling process: More tedious and messy than anticipated.
- Tools used: Spoons, a makeshift paper funnel, and a piping bag (with mixed results).
The Big Reveal and What I Learned
When it was time for dessert at the party, I brought them out on a big tray. They did look pretty, I have to admit. All lined up, these little individual portions. People seemed to like the idea, grabbing one easily without needing to cut a cake or scoop from a big bowl.
But here’s the thing: most folks took one, ate it in about three bites, and then looked around for something more substantial. The 3 oz size, while elegant, just wasn’t quite hitting the spot for a proper dessert for some people. Maybe better for a tasting menu or alongside other, bigger dessert options.

And the cleanup? Well, no washing, which was good. But the sheer volume of plastic waste we had afterwards did make me pause. So many little cups in the recycling bin.
So, what’s my takeaway from this whole 3 oz dessert cup adventure? They definitely have their place. If you’re going for super dainty, or maybe for a kids’ party where small portions are perfect, then sure. Or if you have a lot of patience and a very steady hand. For me, I think I appreciated the idea more than the execution. It was a lot of work for a very small bite. Will I use them again? Maybe. But I’ll definitely think twice and simplify the dessert even more, or just resign myself to the fact that it’s going to be a fiddly afternoon.
It’s one of those things that seems like a brilliant shortcut to fancy, but the “short” part can be deceiving. Still, it was an experience, and I guess that’s what trying new things is all about, right?


