
Right, so I decided to tackle this matcha tiramisu cake thing. Been seeing it around, and honestly, regular tiramisu, while good, gets a bit samey after a while. Plus, I had this tin of matcha powder staring at me from the pantry, practically begging to be used for something other than just another latte. Waste not, want not, right?
Getting Started – The usual kitchen chaos
First things first, I pulled out all the gear. You know the drill. Bowls, whisks, the whole shebang. I always tell myself I’ll be organized, lay everything out neatly like those cooking shows. Never happens. It’s more of a controlled explosion in my kitchen, but hey, it works for me.
Ingredients I grabbed:
- Ladyfingers, obviously. The dry, crunchy kind.
- Mascarpone cheese. Don’t skimp on this, get the good stuff if you can.
- Eggs. Fresh as possible.
- Sugar. Just regular white sugar.
- Heavy cream.
- And the star of the show: matcha powder.
- A bit of vanilla extract too, almost forgot that.
I also brewed some strong green tea. Some recipes say just matcha and water, but I like the depth of actual tea as a base for the matcha soak. Just my preference.
Whipping and Mixing – The messy part
So, I started with the egg yolks. Separated them from the whites – always a bit fiddly, that. Tossed the yolks in a bowl with about half the sugar and whisked like mad. You want it pale and sort of ribbony. My arm was already complaining.
Then, the mascarpone. Gently, gently folded that into the yolk mixture. If you beat it too hard, it can get weird and grainy. Learned that the hard way a long time ago with a classic tiramisu. Not making that mistake again. Added a splash of vanilla here too.
Next up, the heavy cream. Whipped it with the rest of the sugar until it formed soft peaks. Then, folded that into the mascarpone-egg yolk mixture. This is your creamy filling. It looked pretty good, if I do say so myself. Not too stiff, not too runny.
For the matcha dip, I took my brewed green tea (cooled down, important!) and whisked in a good amount of matcha powder. Sift it first, or you’ll get clumps. Nobody wants a clumpy matcha surprise. I tasted it – needed a touch more matcha, a bit more bitter kick to cut through the cream.
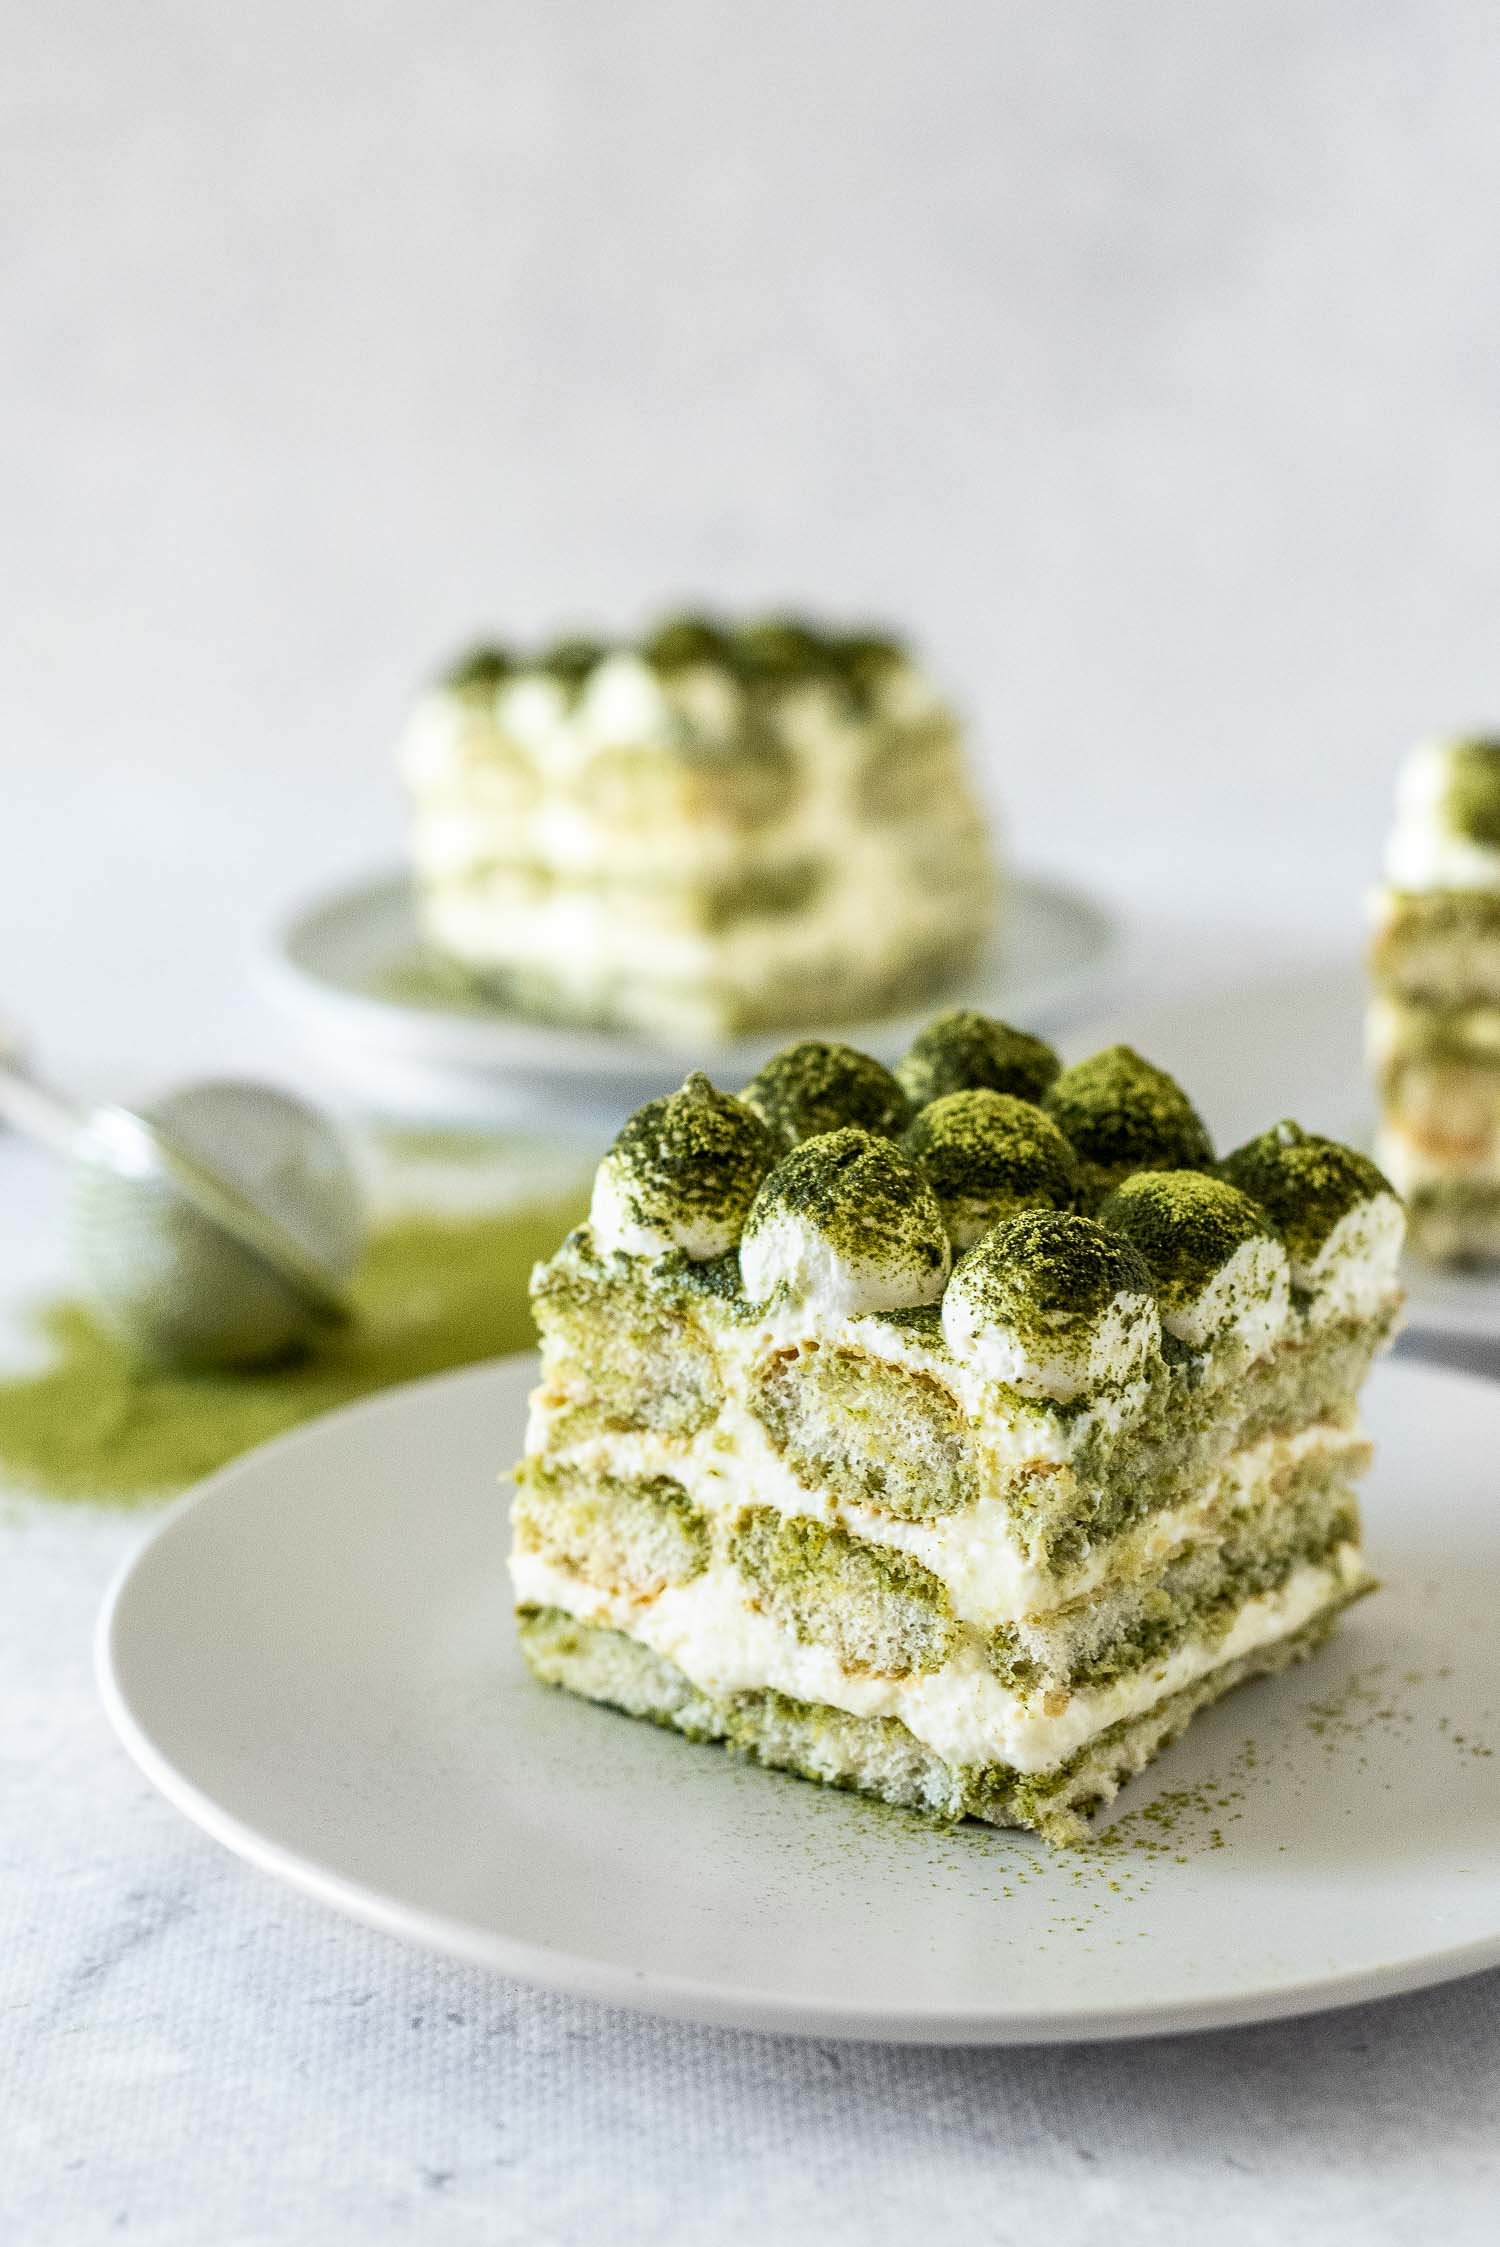
Assembling the Beast – Layer by layer
Got my trusty square baking dish out. Then it was dunking time. One by one, dipped the ladyfingers into the matcha tea. Quick dip, mind you. Don’t let them get soggy and fall apart. That’s just a mess.
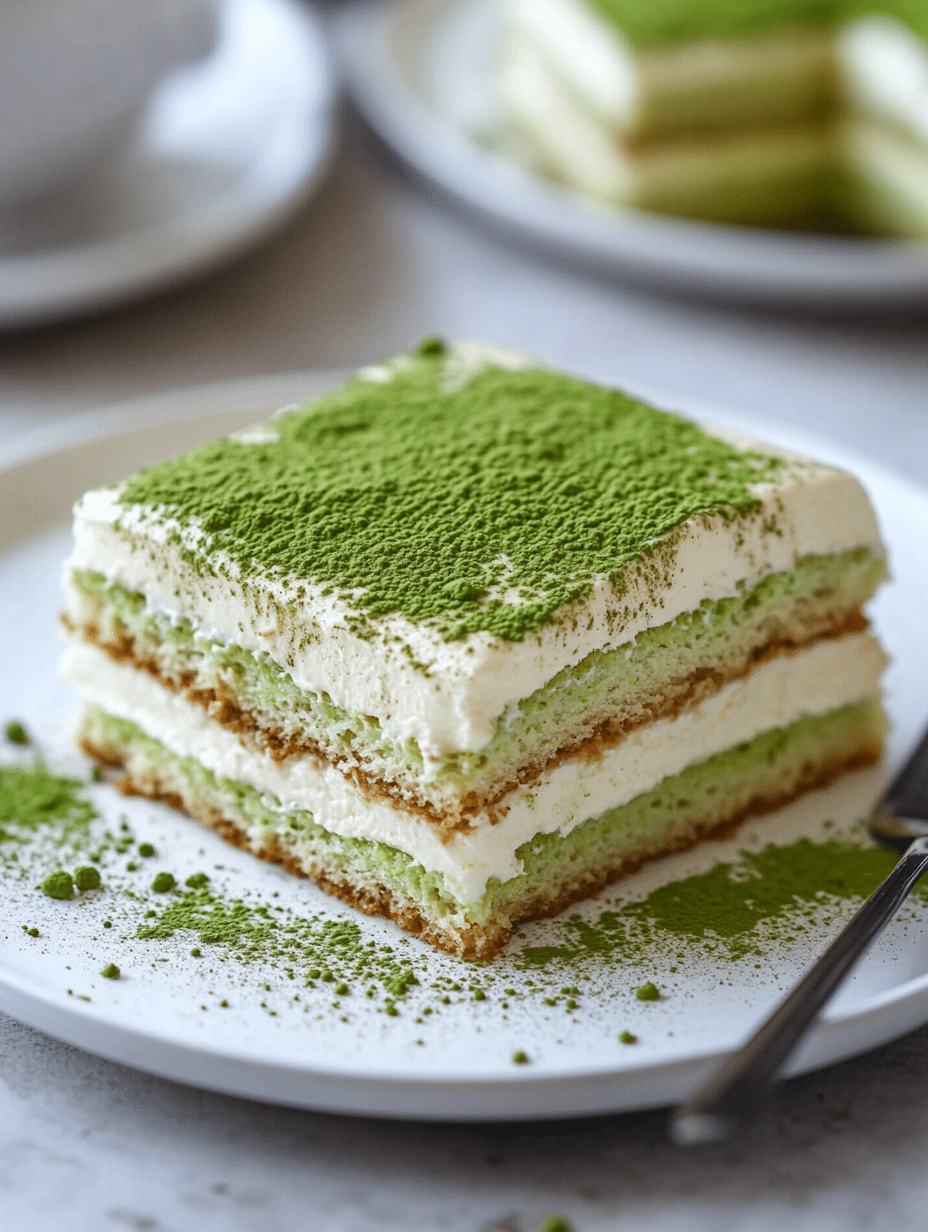
Arranged a layer of these green-soaked fingers on the bottom of the dish. Then, spread half of that lovely mascarpone cream mixture on top. Smoothed it out as best I could. My smoothing skills are… functional. Not winning any awards for presentation at this stage.
Repeated the process: another layer of matcha-dipped ladyfingers, then the rest of the cream. Tried to make the top layer a bit neater. Patience is key here, or so they say. I have some, on good days.
The Waiting Game – And the final touch
And then, the hardest part: chilling. Covered it with plastic wrap and stuck it in the fridge. It needs a good few hours, ideally overnight, for all the flavors to meld together and for it to set up properly. This is where you go do something else, try to forget it exists. Easier said than done when you know there’s a matcha tiramisu waiting for you.
After what felt like an eternity (okay, it was about 6 hours, I caved early), I pulled it out. The moment of truth. For the grand finale, I dusted the top generously with more matcha powder using a fine sieve. This makes it look all fancy and adds that final matcha punch.
And there you have it. My matcha tiramisu cake. It wasn’t perfect looking, a bit rustic, you could say. But the taste? Oh yeah. The slight bitterness of the matcha, the creamy mascarpone, the soft ladyfingers… it all just worked. Definitely a good way to use up that matcha. Might even make it again. Who knows.


