

Okay, let me tell you about the time I decided to try baking a turkey in a brown paper bag. Heard folks talking about it, how it makes the bird super moist, so I thought, why not give it a go?
Getting Started
First thing, I had to get the turkey ready. Made sure it was completely thawed out, which took its sweet time in the fridge, maybe three days for the size I had. Once it was thawed, I took it out of its wrapping, removed the neck and giblets from the cavities – saved those for gravy later, of course.
Then, I gave the turkey a good rinse, inside and out, under cold water. After that, I spent a good amount of time patting it down with paper towels until it was really, really dry. Heard that helps with the whole process.
Next up was seasoning. I kept it simple. Mixed some softened butter with salt, black pepper, a bit of garlic powder, and some dried herbs I had – mostly thyme and rosemary. Rubbed that mixture all over the turkey skin, getting into the nooks and crannies.
The Bag Part
Now for the main event: the bag. I grabbed a large, plain brown paper grocery bag. Checked it to make sure there wasn’t a lot of ink or logos on it. Then, I took some vegetable oil – you could use shortening or butter too, I guess – and generously coated the entire inside of the bag. Really got in there, made sure it was all slicked up. This is supposed to stop the bag sticking to the turkey and help it brown a bit, or so they say.
Getting the turkey into the oiled bag was a bit awkward, not gonna lie. I kind of slid it in, breast-side up. Once it was settled inside, I folded the open end of the bag over a couple of times, nice and snug. Then I used a regular stapler to staple it shut securely. Probably used five or six staples.
Into the Oven
I placed the whole bagged-up turkey into a sturdy roasting pan. Made sure the pan had low sides so air could circulate. It’s important the paper bag doesn’t touch the top heating element or the sides of the oven. I adjusted my oven racks to make sure there was plenty of clearance.
I preheated my oven to 325 degrees F (around 160 C). Then, carefully, I put the roasting pan with the bagged turkey into the oven.
Baking and Finishing Up
Then it was just a waiting game. I calculated the cooking time based on the turkey’s weight, the usual guidelines. The big thing here is you don’t baste it. The bag supposedly keeps all the moisture in, doing the job for you.
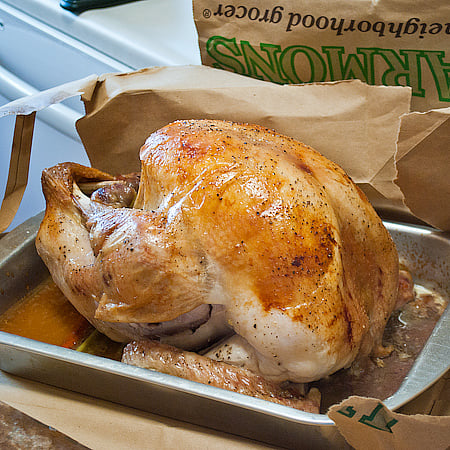
When the cooking time was almost up, I very carefully took the roasting pan out of the oven. Using scissors, I cut the bag open down the middle of the top. Be super careful here – a lot of hot steam comes billowing out.
I peeled the bag away from the turkey. Then I stuck a meat thermometer into the thickest part of the thigh, making sure not to hit the bone. Waited for it to hit the safe temperature, 165 degrees F (74 C).
Once it reached temp, I let the turkey rest in the pan, still partially covered with the opened bag or some foil, for a good 20-30 minutes before carving. This resting part is key for a juicy bird, bag or no bag.
The Result
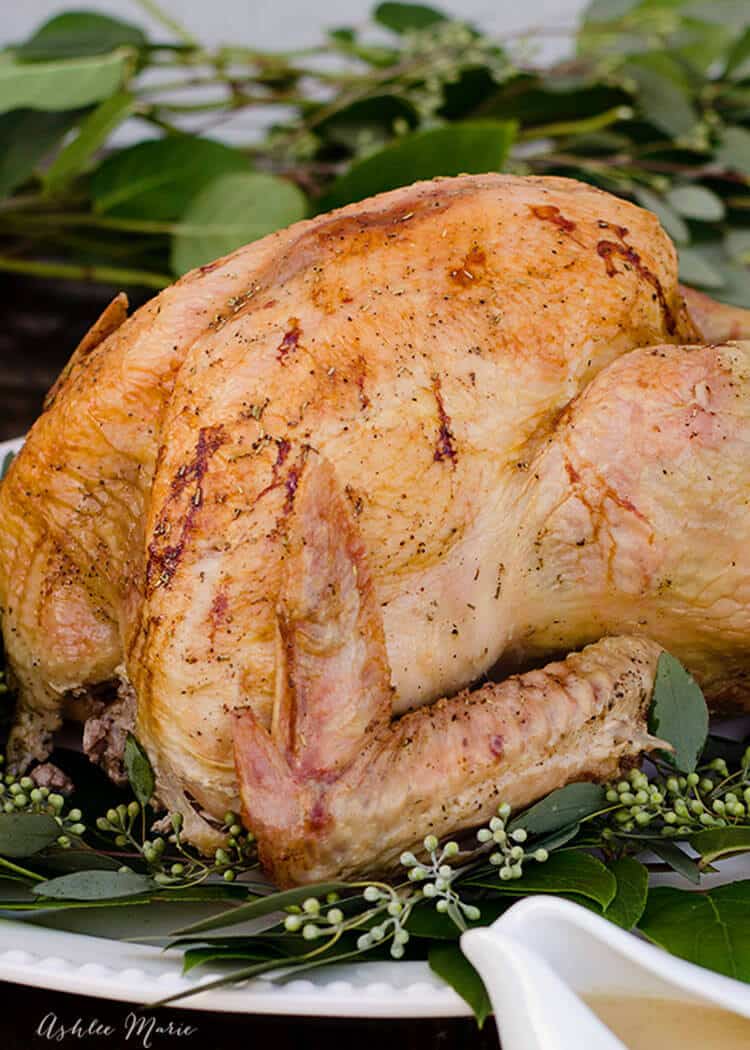
So, how did it turn out? The meat was incredibly moist and tender, maybe the juiciest I’ve made. Seriously fell off the bone. The skin wasn’t crispy golden brown like you get with traditional roasting, it was paler and softer because it steamed inside the bag. But flavor-wise, and for tenderness, it definitely worked. It was an interesting method to try, for sure. Clean up was also pretty easy since the mess was mostly contained in the bag.


