
In the realm of baking, staple bread—often misunderstood as merely a basic, everyday loaf—holds a place of quiet distinction. It’s not just about feeding the family; it’s an art form that, when executed with precision, can elevate the humblest of meals into a culinary experience. Here, we delve into the intricacies of crafting a perfect staple bread, uncovering secrets that will transform your baking endeavors.
At its core, staple bread embodies simplicity. Yet, within this simplicity lies a world of possibilities, shaped by the baker’s touch, the quality of ingredients, and the attention to detail. To begin, let’s dissect the foundation: flour, water, yeast, and salt. While these ingredients may seem ordinary, their interplay is anything but.
Flour: Choose a high-quality bread flour with a high protein content for optimal gluten development. Gluten gives bread its structure, helping it rise and hold its shape during baking. Experimenting with different flour types, such as whole wheat or rye, can add layers of flavor but requires adjusting hydration levels.
Water: Temperature is crucial. Lukewarm water (around 110°F or 45°C) activates yeast most effectively without killing it. The quality of water can also affect the final texture and flavor, so consider using filtered or bottled water if your tap water contains impurities.
Yeast: Instant or active dry yeast works best for staple bread. Proofing yeast in a small amount of warm water and sugar before adding it to the dough ensures it’s active and ready to leaven your bread.
Salt: More than just a flavor enhancer, salt strengthens the gluten network, improving dough elasticity and overall structure. Add it directly to the flour to prevent it from drawing moisture from the yeast, which could slow fermentation.
Now, onto the technique:
Kneading: This step is where magic happens. Knead for at least 10 minutes by hand or until the dough is smooth, elastic, and slightly tacky but not sticky. The feel of the dough should be your guide; it should pass the “windowpane test,” meaning a small piece stretched thinly should be translucent without tearing.
Fermentation: Allow the dough to rise in a warm, draft-free environment. The first rise should be slow and gentle, around 1-2 hours, depending on room temperature. This slow fermentation enhances flavor and texture.
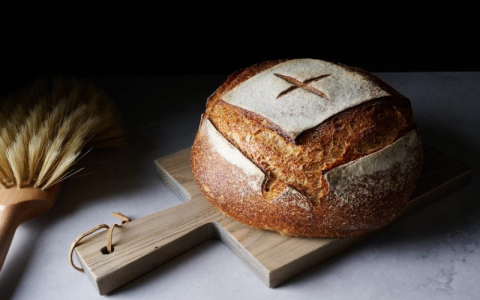
Shaping: Deflate the dough gently and shape it into your desired loaf form. For a rustic look, a simple fold-and-tuck method works well. For a tighter crumb, perform more intricate shaping techniques.
Second Rise: Let the shaped dough rest again, covered, for about 30-45 minutes. This final proof ensures the bread will rise beautifully in the oven.
Baking: Preheat your oven to 450°F (230°C) with a baking stone or dutch oven inside to create steam, crucial for a crisp crust. Score the dough just before placing it in the oven to allow for even expansion. Bake for 30-35 minutes, or until the loaf sounds hollow when tapped on the bottom.
Remember, baking is as much about intuition as it is about recipes. Each batch of staple bread you produce is a testament to your evolving skill and understanding of the dough. Embrace the imperfections; they are the stepping stones to mastery. And so, in the quiet act of baking a loaf of staple bread, you honor a timeless tradition, nurturing both the soul and the senses.


