
Okay, so, I got into this whole cookie-cutter thing recently. I wanted to make some cookies that were a bit more, you know, special. So I went hunting for these “impression cookie cutters” I’d heard about. They’re supposed to leave a cool design on the cookie, not just the shape.
First, I started looking around online to see what was out there. I saw a bunch of different options, some were pretty basic, others were super detailed. I’m not very good at handcraft, so I decided to get a variety pack to start. I found a Christmas-themed one with 24 different shapes, like snowflakes, trees, and gingerbread men, you get the idea. They looked pretty neat, so I ordered them.
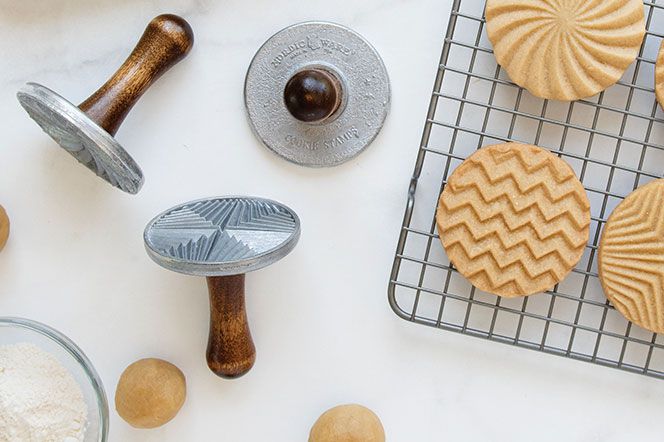
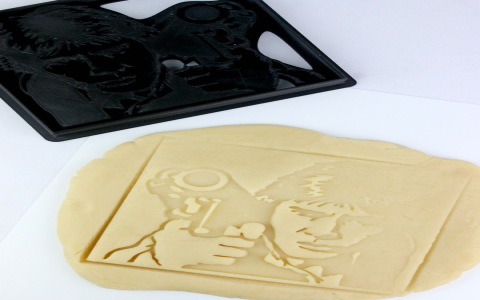
When they arrived, I was pretty excited to try them out. I made a simple sugar cookie dough, the kind you can just roll out. Then I got to the fun part – using the cutters! I pressed them into the dough, and they cut out the shapes nicely. But the cool thing was that each cutter also left a little design pressed into the top of the cookie. For example, the snowflake one made the shape of a snowflake but also pressed a detailed snowflake pattern onto the cookie itself.
I baked the cookies according to the recipe, and when they came out, they looked awesome! They had the fun shapes, but they also had these extra patterns that made them look way fancier than regular cookies. Some of the designs were a little faint, so I learned that you have to press the cutter in pretty firmly to get a good impression.
I also tried dusting the cutters with a little flour before pressing them into the dough. This helped them to not stick as much. It’s a little tip I picked up from a baking blog, pretty useful.
Overall, I’m pretty happy with how my impression cookie-cutter adventure turned out. It was a fun and easy way to make some really cool-looking cookies. Here are some of the tips I can share:
- Choose your cutters: There are tons of different designs out there, so pick some that you like!
- Use a good dough: A simple sugar cookie dough works well.
- Press firmly: Make sure to press the cutter in firmly to get a good impression.
- Flour the cutters: Dusting the cutters with flour helps to prevent sticking.
- Experiment: Try out different designs and techniques to see what you like best!
What I have learned
It’s not that hard to make impressive cookies! With these cutters, it is quite simple, and it brings a lot of fun to the baking time! And a good tip I can share is that the quality of the cutter really matters. Some cheaper ones might not leave a clear impression. So it’s worth investing in some decent ones. I will share more tips next time!


