
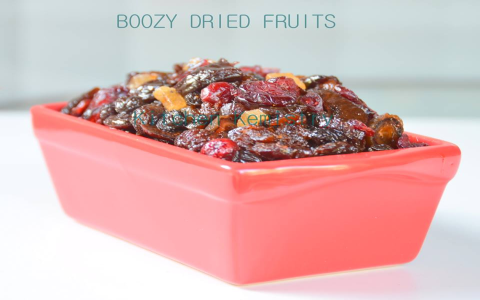
Alright folks, gather ’round! Today, I’m spillin’ the beans on my glazed fruit adventure. It all started with a hankering for a proper fruitcake – the kind that’s dense, boozy, and studded with jewel-like candied fruit.
First things first: Picking the fruit. I hit up the market and grabbed a mix of stuff: cherries (both the bright red and the dark, almost black ones), some apricots, a few plums that were just begging to be glazed, and of course, some citrus peel – gotta have that zing! I gave everything a good wash and let it dry completely. This is important – you don’t want soggy fruit messing up your glaze.
Next up: The pre-cook. Some folks skip this, but I swear it makes a difference. I simmered each type of fruit separately in a bit of water until they were just starting to soften. Not mushy, mind you, just a little tender. This helps them absorb the syrup better later on. Then, I drained ’em and let ’em cool.
Now for the syrup! This is where the magic happens. I combined equal parts sugar and water in a saucepan – I used about a cup of each to start. Then, I added a splash of lemon juice – helps prevent crystallization, ya know. I brought it to a boil, stirring until the sugar dissolved completely. Once it was clear, I reduced the heat to a simmer.
Glazing time! This is the tedious part, but trust me, it’s worth it. I added the fruit to the simmering syrup, making sure it was all submerged. Then, I just let it simmer – low and slow – for what felt like forever. We’re talkin’ hours here, people. The key is to keep an eye on it and stir occasionally to prevent sticking.
Patience is key. As the syrup cooks down, it gets thicker and glossier. The fruit becomes translucent and almost candy-like. It’s a slow transformation, but it’s beautiful to watch. I kept simmering until the syrup was nice and thick, coating the fruit evenly.
The drying rack: Once I was happy with the glaze, I carefully fished the fruit out with a slotted spoon and arranged it on a wire rack to dry. This took another few hours, maybe even overnight. You want the glaze to set completely so it’s not sticky.
The final touch: Once the fruit was dry and shiny, I tossed it in a little bit of powdered sugar to prevent it from sticking together. And that was it! Glazed fruit, ready for my fruitcake.
The results?
- The fruit was incredibly flavorful and vibrant. The glazing process really intensified the natural sweetness and tanginess.
- The texture was perfect – slightly chewy on the outside, soft and tender on the inside.
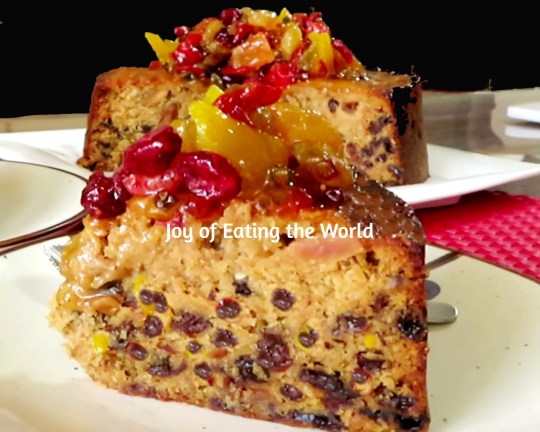
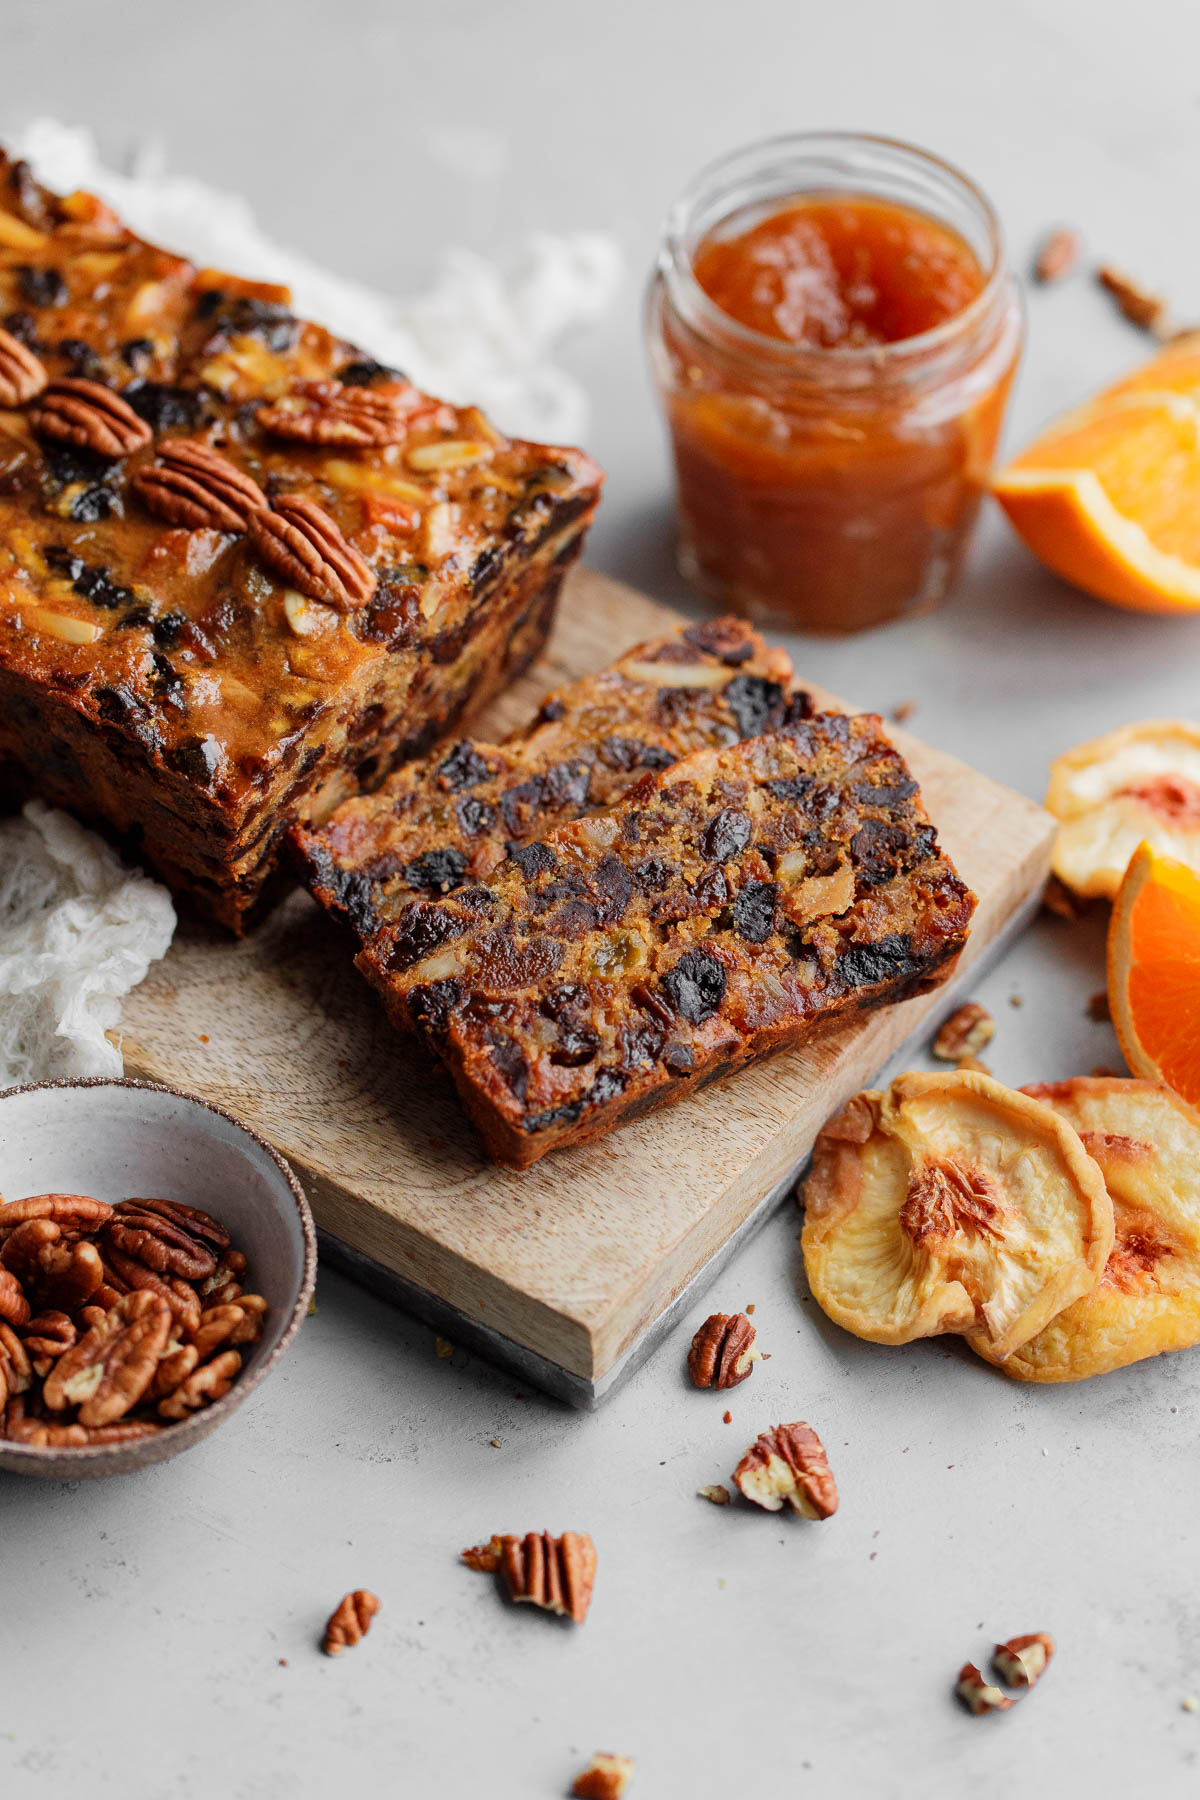
- And most importantly, the fruitcake was a huge hit! The glazed fruit added a beautiful visual appeal and a burst of flavor that took it to the next level.
Would I do it again? Absolutely! It’s a bit of a time commitment, but homemade glazed fruit is so much better than the store-bought stuff. Plus, you get to customize the flavors and colors to your liking. Give it a try – you might just surprise yourself!


