
So, I was hit with a major craving for something sweet the other day, and you know what came to mind? Those amazing Biscoff cheesecake dessert cups. Instead of just dreaming about them, I figured, why not just make a batch? It’s not rocket science, and honestly, homemade always tastes better, right?
Getting My Stuff Together
First thing I did was raid my kitchen. You know the drill. I pulled out a sleeve of those Biscoff cookies – they’re the star, obviously. Then, a block of cream cheese, because what’s cheesecake without it? Grabbed some sugar, a bit of butter (unsalted, that’s my go-to for these things), a carton of heavy cream, and the most important part: a big jar of that lovely Biscoff spread. Had to make sure I had enough of that goodness.
Making the Crumbly Base
Alright, for the crust, I took a good handful of Biscoff cookies, maybe about 10 or 12 of them. Chucked them into a ziplock bag. Then I let out some frustration by whacking them with a rolling pin until they were pretty fine crumbs. You don’t want dust, but you don’t want big chunks either. Then, I melted, oh, about two tablespoons of butter in the microwave. Poured that melted butter right into the crumbs and gave it a good mix. You’re looking for a texture like wet sand, something that’ll stick together a bit.
Whipping Up the Cheesecake Filling
Next up, the best part – the cheesecake filling. I let a block of cream cheese sit out for a bit to soften. Seriously, don’t skip this, it makes mixing way easier. Tossed that into a big bowl. Added about half a cup of sugar. I don’t like things tooth-achingly sweet, so adjust to your own taste. Then I got out my trusty hand mixer and beat it all together until it was super smooth. Lumps are the enemy here! Once that was done, in went the Biscoff spread. I was generous, probably a good half-cup, maybe a smidge more. Mixed that in until it was all beautifully swirled together. In a separate bowl, I whipped up about a cup of heavy cream until it got nice and fluffy, like soft clouds. Then, I gently folded that whipped cream into the Biscoff cream cheese mixture. You want to keep it light and airy, so don’t go crazy stirring.
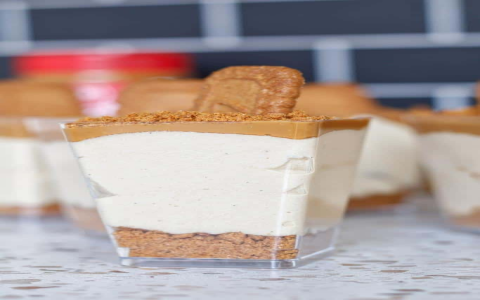
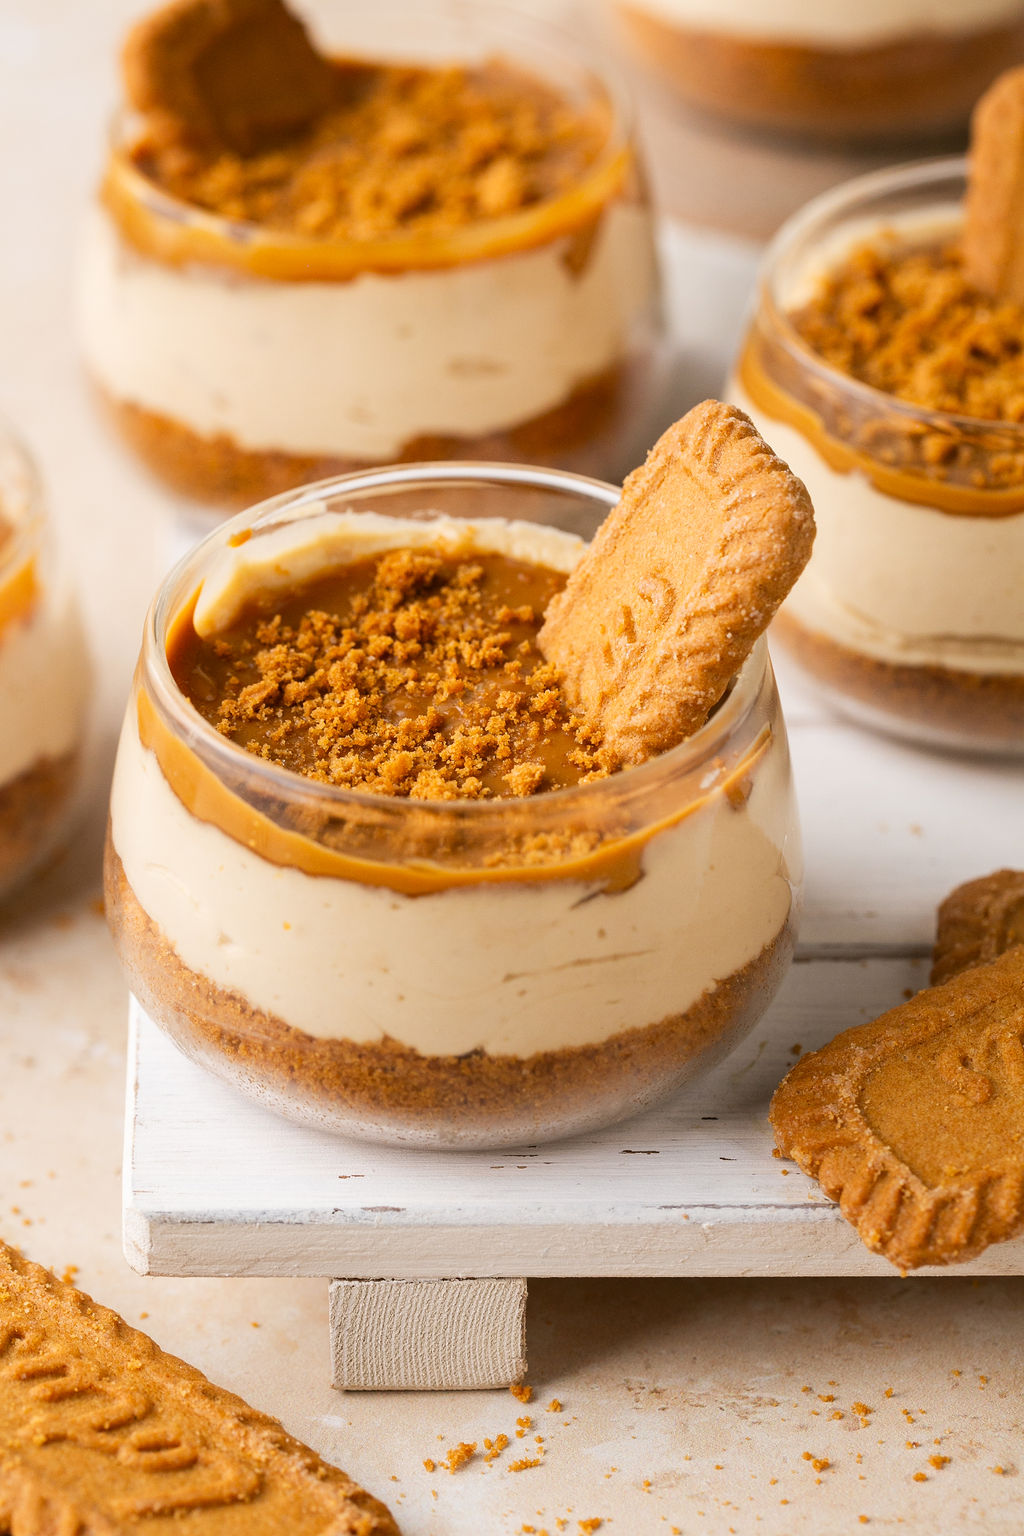
Putting It All Together in Cups
I grabbed some small glass cups – I like using clear ones because it just looks so much nicer when you can see the layers. Took a spoon and put a layer of the Biscoff crumb mixture into the bottom of each cup. Patted it down a little with the back of the spoon so it was kinda firm. Then, I carefully added the cheesecake filling on top. You can use a piping bag if you want to be fancy, but honestly, a spoon works just fine. I like a nice, thick layer of the filling. No skimping!
A Little Extra Something on Top
Because you can never have too much Biscoff, right? I sometimes melt a little extra Biscoff spread in the microwave for like 10 seconds and then drizzle it over the top of the cheesecake filling. Or, if I’m feeling lazy, just a sprinkle of more crushed Biscoff cookies does the trick. Adds a nice touch and more of that delicious flavor.
The Waiting Game – Chilling Time
And now, the part that tests my patience every single time: chilling. I covered the cups and popped them into the fridge. They really need a good few hours to set up properly – I’d say at least 4 hours. If you can manage to wait overnight, they’re even better. But who has that kind of self-control?
The Delicious Result!
So, after what felt like an eternity, I finally got to dig into one. And oh my goodness, they were absolutely worth the wait. So creamy, that lovely Biscoff flavor in every bite, with the crunchy base. Just perfect little individual desserts. They disappeared pretty quickly, as you can imagine. Definitely a recipe I’ll be making again and again. Super easy, and everyone always loves them, even if “everyone” is just me enjoying a treat!


