

Okay, so I’ve been wanting to make madeleines for ages, you know, those cute little shell-shaped cakes? I finally got around to getting a proper mold, and let me tell you, it makes all the difference!
Getting Started
First things first, I grabbed a madeleine baking mold. I found one at a local kitchen store, but you can easily find these online, too. This one is metal, which I prefer because I think it helps bake them more evenly. I read online before that silicone also works well.
The Baking Process
- I looked up a basic madeleine recipe online. Nothing fancy, just a simple butter cake recipe, really. The key is to get the batter just right – not too thick, not too runny.
- I melted some butter and brushed it all over the insides of the mold. Don’t skip this step! It’s essential to prevent the madeleines from sticking. I use my fingers to be honest.
- Then I added in a small spoon, flouring every shell.
- Then, I spooned the batter into each of the shell shapes. I was careful not to overfill them – about two-thirds full seemed to be the sweet spot.
- I popped the mold into the preheated oven. It’s important that my oven at the right temperature.
- I kept an eye on them while they baked. The edges should be golden brown, and the centers should spring back when you lightly touch them.
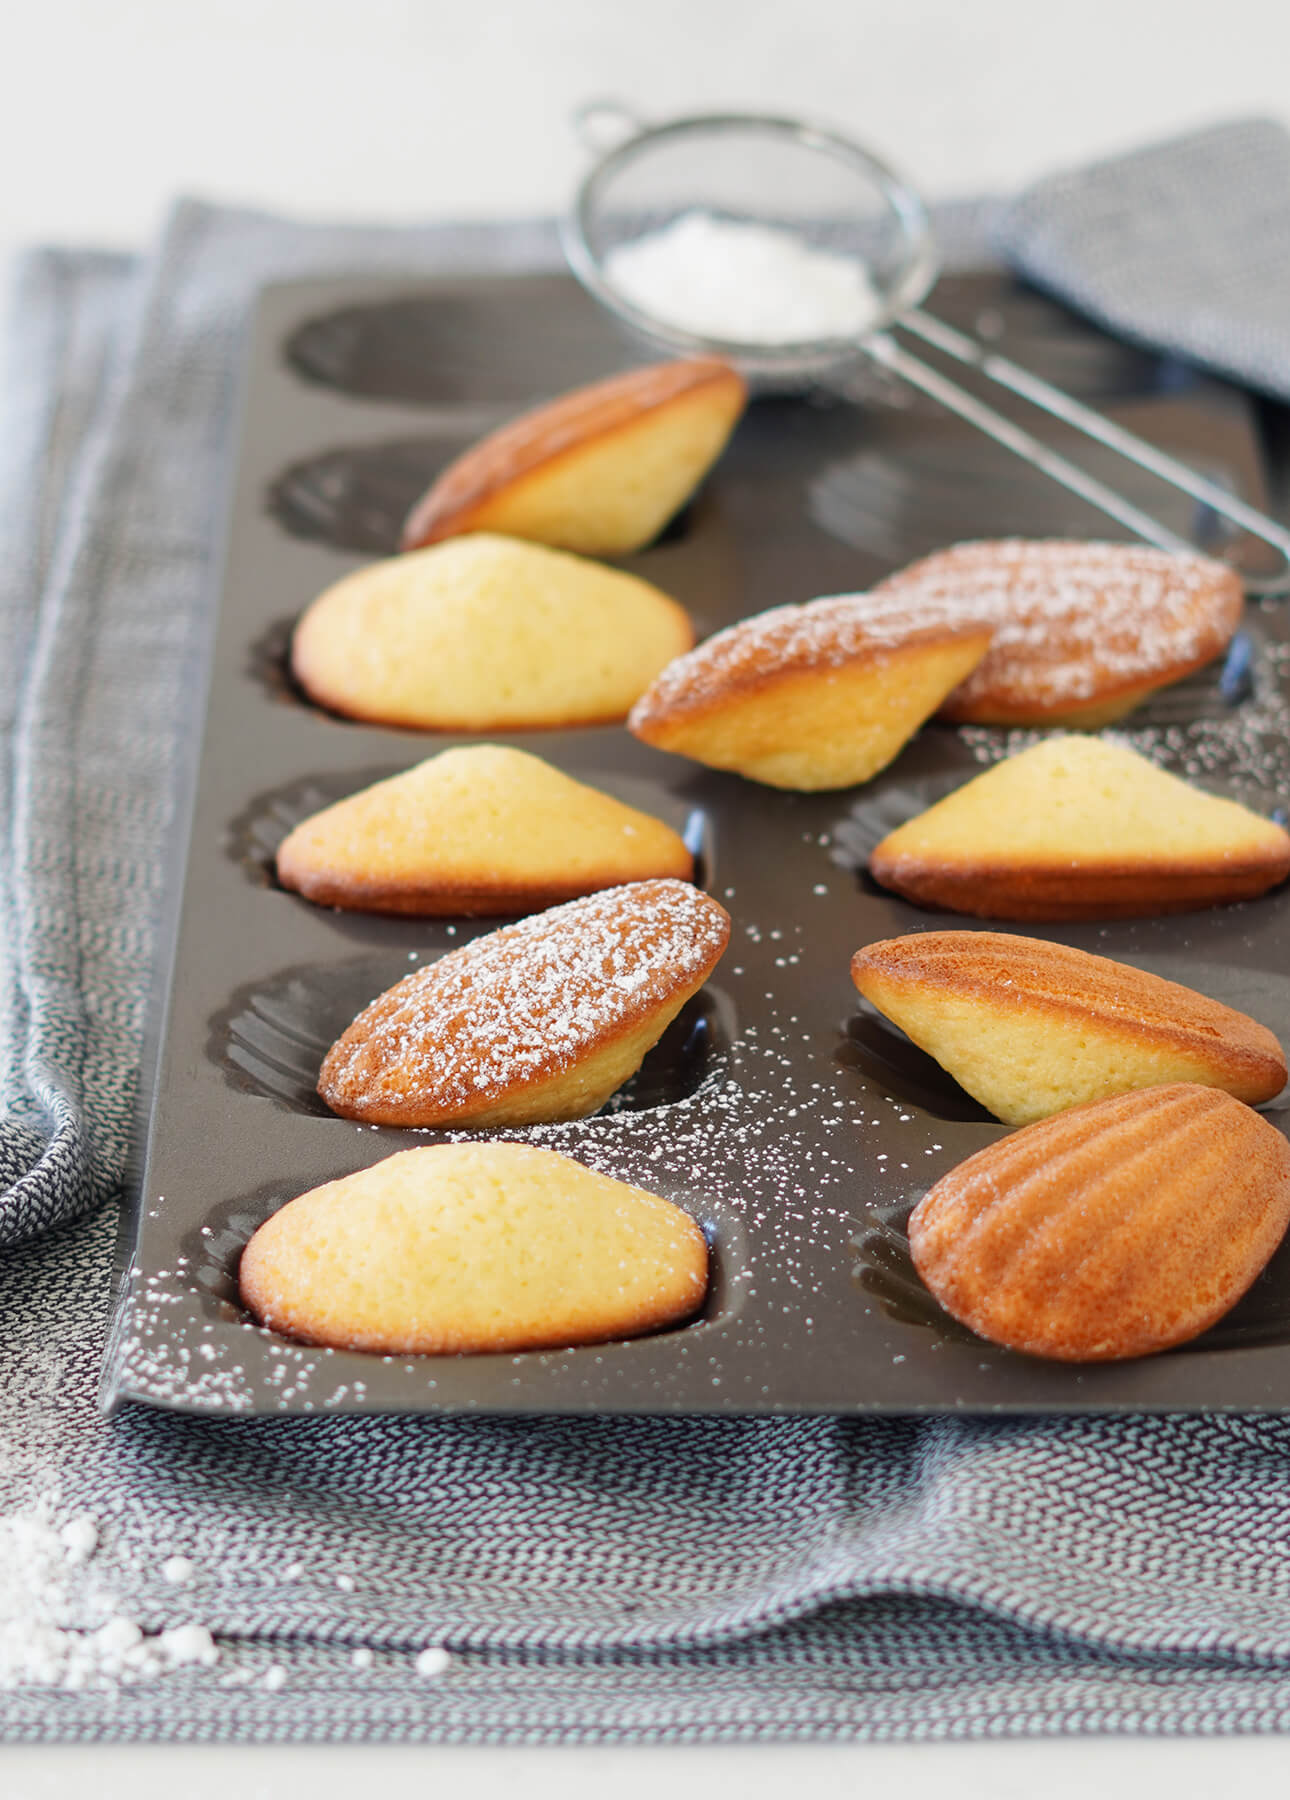
The Results
Once the baked, I took the cakes out. I let them cool slightly in the mold, and then, I gently tapped the mold on the counter, and the madeleines popped right out!
They looked so perfect, with those signature shell patterns. And they tasted amazing – buttery, slightly sweet, and just the right amount of fluffy. I was so proud of myself! I’m now preparing a cup of coffee to get with them.
Honestly, having the right mold made the whole process so much easier and the results so much better. I’m already excited to make another batch!


