
Well now, if ya got yerself one o’ them old Hoosier cabinets, an’ it’s lookin’ all dull an’ faded, don’t y’all worry none. It ain’t too late to bring it back to life. Them cabinets were mighty useful in the old days, and with a little work, they can still shine like they did when first built. Now, let’s talk about how to refinish a Hoosier cabinet, specially the ones with that fancy flour bin an’ sifter.
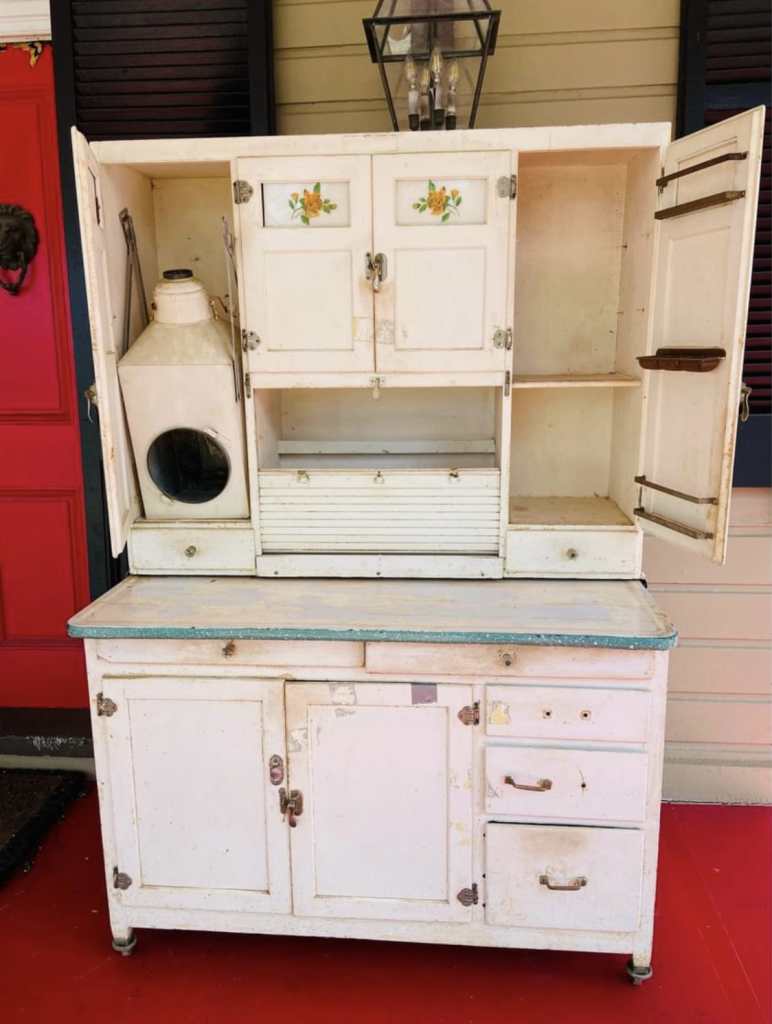
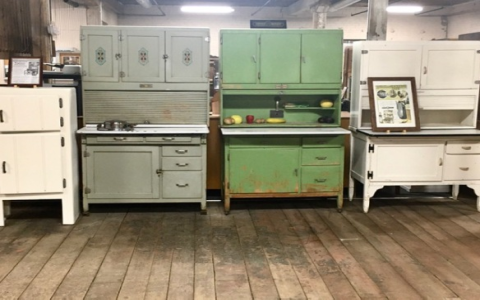
First thing, ya gotta know that these cabinets were built tough. They were made outta solid wood, mostly oak, and last a long time if they’re treated right. The flour bin and sifter that come with these cabinets? Well, they’re a big part of the charm. Back in the day, folks used them for makin’ bread, cakes, or anythin’ else that needed flour. So, if yer cabinet has them parts, ya got somethin’ real special.
Now, before ya start refinishing, it’s important to take a good look at the condition of the cabinet. If it’s all scratched up or the finish is chipped, then ya gotta put in a bit o’ elbow grease. But if it’s in fair condition, don’t be too hasty. Sometimes just a good cleanin’ is all it needs.
Step 1: Clean the Cabinet
Start by givin’ the cabinet a real good scrubbin’. Get rid of all the dust an’ dirt that’s built up over the years. Use a gentle cleaner, like a mix of water an’ dish soap, and wipe it down with a soft cloth. Don’t be usin’ anything too harsh, or ya might mess up the wood finish. If it’s really dirty, ya might wanna use a wood cleaner or even a bit of vinegar diluted in water. Just be careful, ya don’t wanna soak the wood.
Step 2: Sanding the Wood
Once it’s nice and clean, it’s time to sand down the wood. Now, y’all don’t gotta go too deep with the sanding, just enough to smooth out the surface and get rid of any old finish. If yer cabinet’s got a thick layer o’ varnish, start with a coarser sandpaper, then move on to finer grit as ya go. Don’t rush this part, ‘cause a good smooth surface is key for a nice new finish.
Step 3: Fixing the Flour Bin and Sifter
Now, about that flour bin an’ sifter—those parts can wear out, too, ‘specially if they’ve been used a lot. If yer sifter don’t work like it used to, ya might need to clean or even replace the mesh. Most o’ the time, ya can just clean it with a brush, but if it’s rusted or broken, it’s best to replace it. Don’t forget to oil the hinges an’ the parts that move so they work smooth once more.
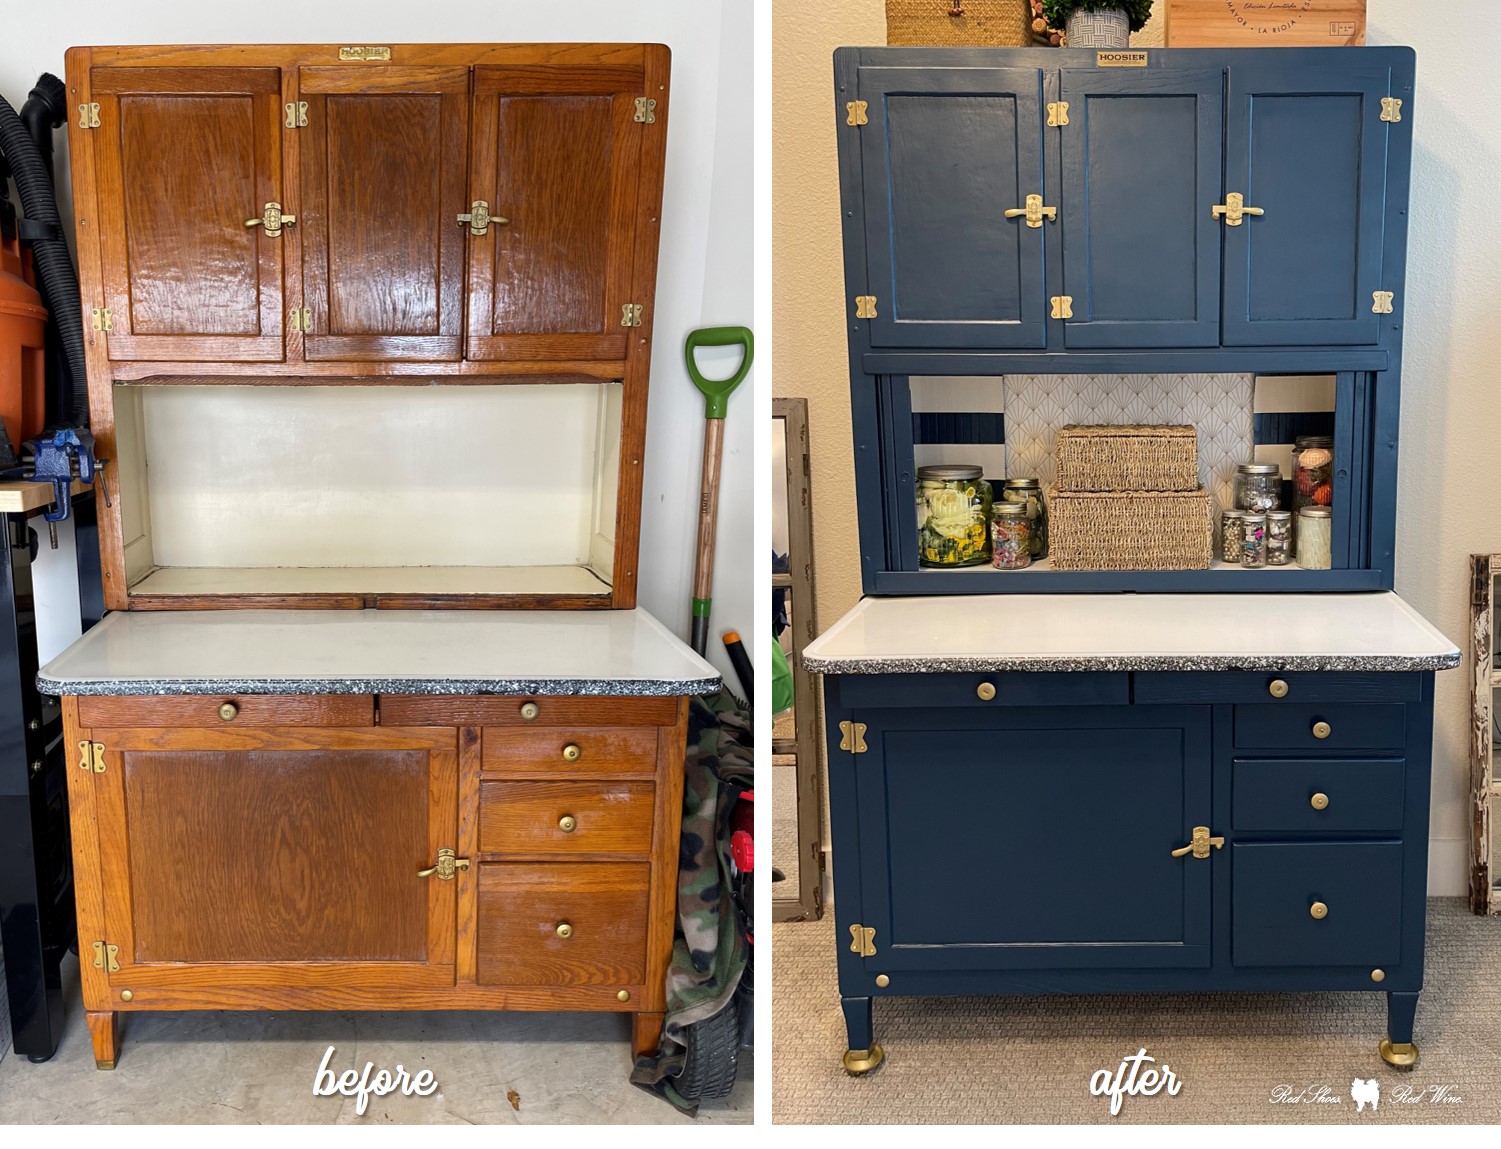
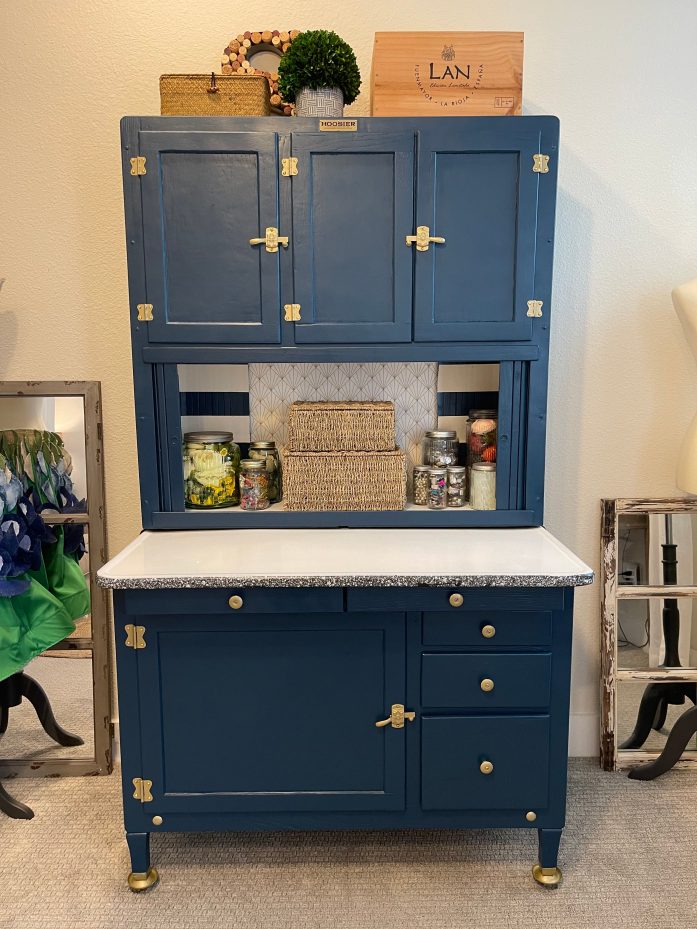
Step 4: Staining or Painting the Cabinet
Once yer sanding is done, ya gotta decide if ya want to stain it or paint it. If ya want to keep that old-time look, a good stain might be what yer lookin’ for. It’ll bring out the grain of the wood and give it a warm, natural finish. But if ya feel like brightenin’ it up, a coat o’ paint will do wonders. Just remember to use paint that’s made for wood, and make sure to apply thin coats, lettin’ each one dry ‘fore ya add the next.

Step 5: Sealing the Cabinet
After the paint or stain is dry, ya gotta seal it up to protect it. Use a wood sealer or polyurethane, an’ apply a thin coat. This will keep the wood safe from spills and wear, especially if yer gonna be usin’ that flour bin again. Don’t skip this step, ‘cause it’ll help yer cabinet last another fifty years.
Now, don’t forget—when you got a Hoosier cabinet, especially one with all the original parts, it’s worth a fair bit! If it’s in good shape, ya might be lookin’ at somethin’ worth a couple thousand bucks, but even a cabinet in need of refinishing can fetch a nice price if it’s been cared for well. So, whether yer doin’ this for the love of an old piece of furniture or to add some value, refinishing a Hoosier cabinet with a flour bin an’ sifter is sure to be a rewarding task.
By the end of it, ya’ll have a piece o’ history back in tip-top shape, ready to take its place in yer kitchen once again. With a little time and effort, yer old Hoosier can be the centerpiece o’ yer home, just like it was back in the good ol’ days.
Tags:[Hoosier cabinet, flour bin, sifter, refinishing, vintage furniture, wood restoration, DIY, kitchen cabinet]


